

MISUSE 03: Layer the “drawn” (modeled) section cuts with the modeled section cuts by modeling system, loadable, or in-place families and cutting them with a section box. In Revit, section cuts are made using automated section boxes in 3d or by cutting through a plan. Misuse 03 works against the tool by layering two methods for making section cuts in order to slow the process for seeing and constructing sections.
1- The Architectural Detail:
- Read FORD_The Architectural Detail_Ch 4.
- Define selective detailing, animated joint, articulated joint, adjacent joint, dissonant joint, autonomous detail, system family, loadable family, in-place family, displaced views, cut views, stitched views, and section box.
2- Constructional Narratives:
- Add public space, no more than 6,000sf, north of the existing building.
- Establish a part to whole relationship between the existing and new.
- Program the transition by changing awareness in engagement.
FRIDAY 09.20_The Performance (Due Monday 09.23)
In class, we discussed Lectures 06_The Performance, 07_Displaced Views, and 08_Stitched Views. For Monday 09.23.
1- Generate three (3) frames via screenshots, printed pdfs, exported jpegs, or videos. THE QUALITY MUST BE EXCELLENT! What is the first frame? What elements are displaced, stitched, cut, hidden? What angle do you use? What shot do you use? What are the motions used between frames? What moves- the object, the frame, the projector?
2- Continue to work on the detail.
3- Look at the project brief 01_The Four Misuses again.
WEDNESDAY 09.018_More Details (Due Friday 09.20)
In class, we discussed Lecture 05_Details. On Friday we will continue our discussion, but expand it to methods of making constructional performances. For Friday 09.20, please complete the following:
1- Save your most recent file as 190918_Site and upload it to Box. Save a new file as 190920_Detail and upload it to Box once you have completed steps 2 and 3 below.**
2- Using your previously “drawn” detail, incorporate it into section 01, section 02, or section 03.**
3- Only use model lines and detail lines to “draw” (model) the detail. DO NOT USED MODELED ELEMENTS I.E. FAMILIES.
** You are welcome to use your initial detail or “draw” (model) other details. I will place books in the studio this afternoon for you to reference in case you are looking to test more details (these are my personal books so please care for them). If you “draw” model multiple iterations, you can move the drawing into another area of the model space or save multiple iterations of the file on Box (i.e. 190920_Detail 01, 190920_Detail 02, 190920_Detail 03).
MONDAY 09.016_Details, Site, & Graphics (Due Wednesday 09.18)
As we continue to unfold Constructional Narratives, the story you want to tell about the Ag Heritage Museum through Constructional Images of an addition, we need to take a better look at the site. For Wednesday 09.18:
1- Read FORD_The Architectural Detail_Ch 4. Be prepared to define Keywords from the reading and to attempt to categorize the details you researched according to the reading.
2- Add elements of the site to the three (3) section cuts. These should be “drawn” (modeled) using model lines. Elements should be topography changes as well as surrounding buildings. The images should be just as detailed as what is included in the image below:
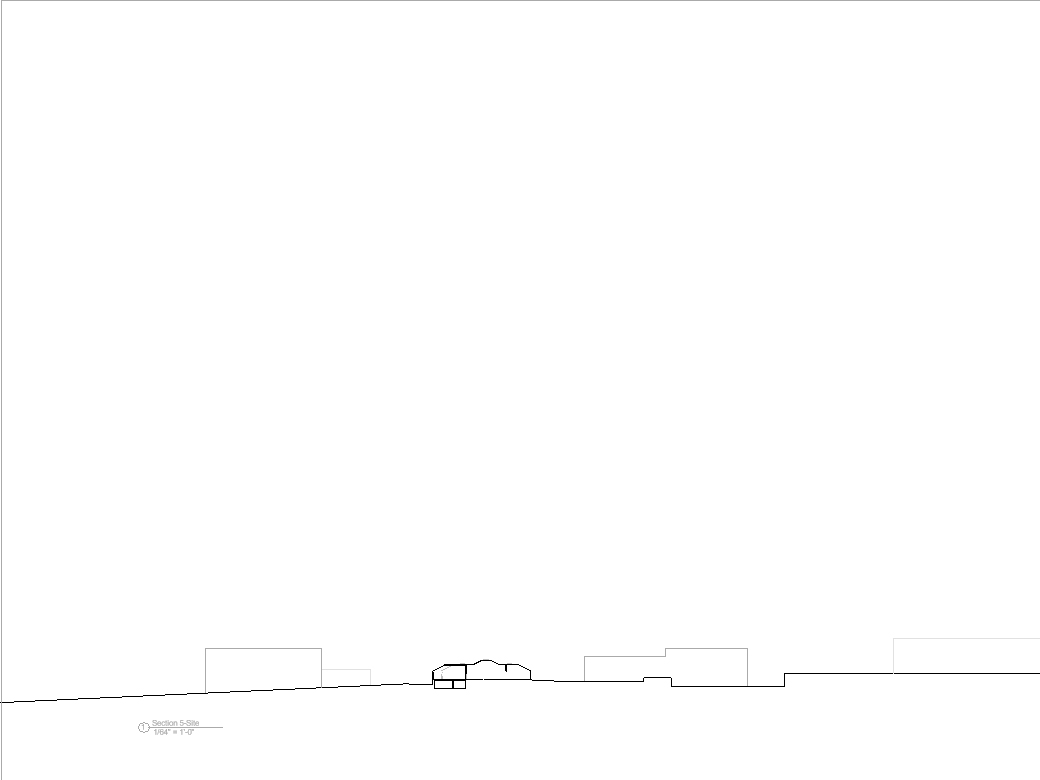
3- Begin to think about the graphic settings for your image and how it will be presented for the review. Lecture 04_Graphics, Section Boxes, and Wall Sections supports graphic changes, cuts, and more robust additions.
